Create Your Own Holographic Day of the Dead Stickers
Add a touch of sparkle to your Day of the Dead celebrations with a craft project you'll love. Learn how to make your own holographic stickers using a free printable.

Día de Muertos is one of the most vibrant and colorful celebrations in Mexico. We love to decorate our altars and spaces with marigolds, papel picado, and of course, lots of sugar skulls.
This time, I wanted to give our celebration a fun twist with this easy and fun crafty project: making our own holographic Day of the Dead stickers at home! They're perfect for decorating anything you can imagine, from your laptop and water bottle to your notebooks or letters for your friends.
This post contains affiliate links. Thanks for supporting our site!
MATERIALS:
Dia de Muertos Printable Stickers. Download the PDF here.
Printable White Sticker paper.
Note: Here’s a helpful tip for your stickers: If you want to use them on a coffee mug or a water bottle, grab some waterproof sticker paper so they last forever and don’t get damaged! For all your other projects—like decorating a planner or a notebook—you can use regular sticker paper, which is a more affordable option that works just as well.
Scissors
Holographic cold laminate like these
How to Create Your Own Holographic Day of the Dead Stickers:
1. Download and Print Your Stickers
First, download the Día de Muertos Stickers PDF here or by clicking the image below. Print the file onto your printable sticker paper.

2. Rough-Cut Your Stickers
After you print your stickers, cut around each shape, leaving a small border around each design. By cutting them into smaller shapes now, you'll avoid wasting holographic laminate and prevent air bubbles when you apply it.

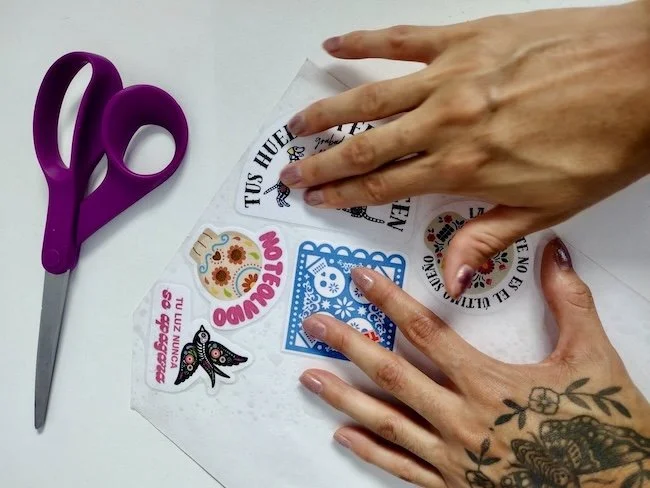
3. Carefully Apply the Laminate
Peel the protective paper from the holographic laminate and place it on a table with the adhesive side facing up. Now, take your rough-cut stickers and, with the printed side facing down, carefully place them onto the laminate.

Using your fingertips or a plastic card, gently press each sticker to make sure it adheres well and to smooth out any air bubbles.
4. The Final Cut
Now that your stickers have their holographic protective layer, it's time for the final cut! Using your scissors, carefully remove the extra border and follow the sticker's shape more precisely. You'll see how the holographic, sparkly effect gives your stickers a unique touch!

And just like that, you'll have some cute, adhesive stickers that sparkle and are also protected from water for all your Día de Muertos inspired projects.
