A Meaningful Kids' Activity: DIY Cardboard Photo Frame for Your Ofrenda
Ready for a meaningful Día de Muertos craft? Grab our free printables below and a cereal box to make a colorful DIY photo frame. It’s the perfect kids' activity for parents and teachers.

Download the PDF Frame Dia de Muertos for your altar below
To all the amazing parents and teachers out there: Are you looking for a colorful, hands-on Día de Muertos activity for the kids? This is it! Día de Muertos is one of my favorite celebrations—it’s a beautiful tradition that’s all about celebrating life and the lovely memories of the people we love.
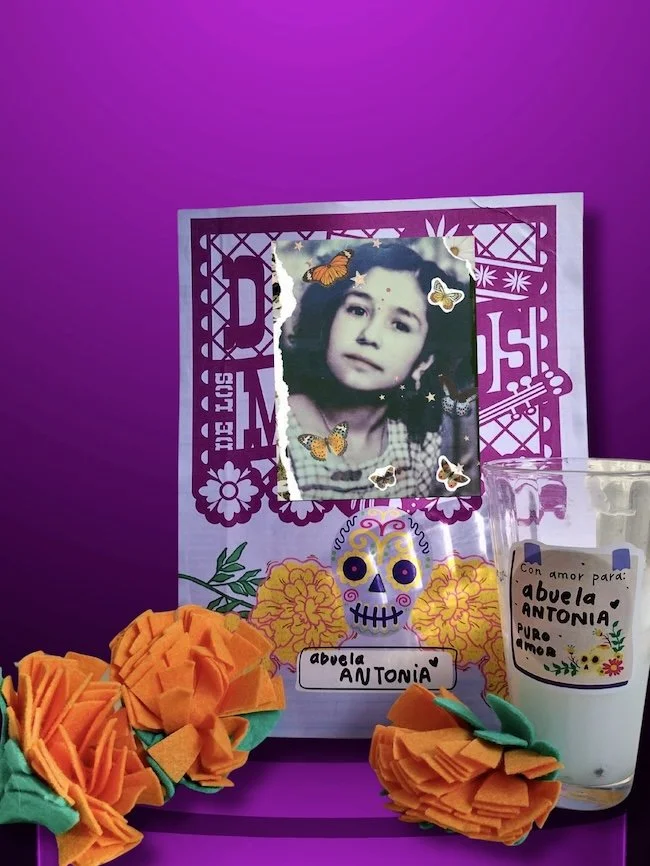
The heart of the holiday is the altar de muertos, or ofrenda, which we fill with bright marigolds, favorite foods, and the most important element: photos of our loved ones.
A personalized photo frame is the perfect kids' craft to include children in the tradition! It allows them to honor someone special and ensures that person gets the best spot on your altar at home or in the classroom. This project is simple, colorful, and uses materials you probably already have at home (hello, cereal box!).
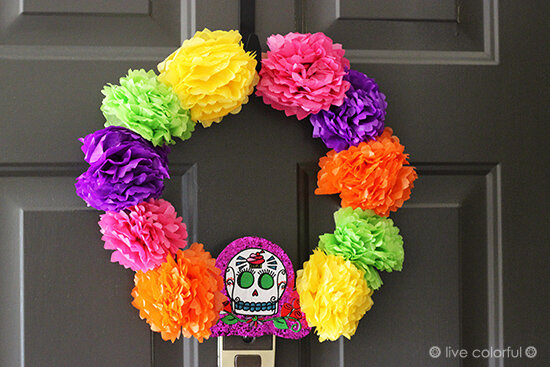
Take a look at some of the altars we’ve created in the past so you can get a better idea of what to make. Now, let’s craft a special frame to send some love to those we remember!
MATERIALS:
Printable Frame Dia de Muertos: Download Live Colorful free Día de Muertos Photo Frame printable (sized for letter paper) HERE or link on the image above.
Printed Photo: A photo of your family member or loved one.
Cardboard: Thin cardboard, like an empty cereal box or a lightweight delivery box.
Scissors
White Craft Glue or glue sticks
Pencil
DIY Cardboard Photo Frame for Your Ofrenda
1. Print Template First, download the Día de Muertos Photo Frame printable. Make sure you select the best quality settings on your printer to get some vibrant colors!
2. Glue the Printable to Cardboard This is where we add the sturdiness! Using your white craft glue, apply a thin, even layer of glue to the back of the printable, and carefully press it onto your piece of cardboard.
Smooth out any wrinkles and let it dry completely.
3. Cut Shape of Your Frame. Once the glue is totally dry (give it plenty of time to set!), it's time to cut out the shape of your frame. Use your scissors to cut carefully along the outer edge of the printable image. Make sure you are cutting through both the paper and the cardboard at the same time! Now you have a sturdy, colorful base for your frame that is ready for the easel stand.

Creating the Folding Easel Stand
4. Trace and Cut the Easel Piece Take your leftover cereal box cardboard and your pencil. You're going to create the easel that holds the frame up!
Draw a simple rectangle that is about 4 inches wide and 7 1/2 inches tall.
From the top center of the rectangle, draw two diagonal lines that connect down to the bottom corners. You should now have a triangle shape drawn within the rectangle.

5. Fold the Easel Take your cardboard rectangle and fold it in half lengthwise (from top to bottom). Now, to make sure it stands steady, make small diagonal cuts (about one inch long) on the bottom corners. This creates a little "foot" and allows the stand to rest nicely on the altar surface.
6. Glue the Stand in Place Take your folded easel piece and apply white glue only to one side (one half) of it. Now, press that glued side firmly onto the back of your photo frame, making sure the top of the easel is about 1 inch below the top edge of the frame. It's important to glue only one side so the other side can swing out like an easel! Let the glue dry completely before setting it up.

7. Add Your Photo The very last step is the most heartfelt! Apply a little white glue to the back of your loved one's photo and gently place it onto the frame, aligning it with the marked photo area on the printable. You can also add some fun glitter or sequins for an extra special touch and the name of your beloved one below the picture.

If you are a teacher, this can be a beautiful and meaningful activity to share with your class. It's a great way to talk about the history and the culture behind the ofrenda, and it's a fun craft that everyone can participate in.
Check out more ideas to share with your students or to decorate the classroom this Día de Muertos: Día de los Muertos Printables and Día de Muertos Crafts.
Here are a couple of pictures from previous years—each year we honor the tradition in a different and special way. Now, let’s craft a special frame to send some love to those we remember!