How to Sew a Car Organizer
How to design and sew a simple car organizer to keep everything in its place.
This post may contain affiliate links.Thank you for supporting this website!
I feel like I had been so quiet lately here on the blog. The reason is that just when summer started, I felt the urge to hide from the online world and try something new. So, I took some online courses to get better at designing fabric and patterns, one of my passions of all time. I also decided to learn how to sew and took some sewing classes with a local blogger friend. I had a sewing machine in my craft room for a long time, but honestly, I just used it once or twice every year. I only know how to make pillows, but there are a limit number of pillows that you can make every year!
My sister actually inspired me to learn how to sew too. She is so good at it! And she always had great ideas that look so simple, like the popular tutorial she shared on our Youtube channel a few months ago, Como Hacer un Tapete de Pompones.

I started sewing a bit more and I already found some amazing sewing blogs and communities and I’m feeling excited about it. It will be great to make things for the house with colors and fabric, a poco no?
For instance, I made my first project this week. It’s an organizer for the car.I had been wanting to do something like this for a long time, so yesterday I took some fabric I had at home and just started sewing. My design is super simple, you can read how I made mine below, but if you are amazing at sewing and want to try something more complocated, check out this professional pattern on Etsy.
MATERIALS:
Medium weight fabric
Coordinating thread
Sewing machine
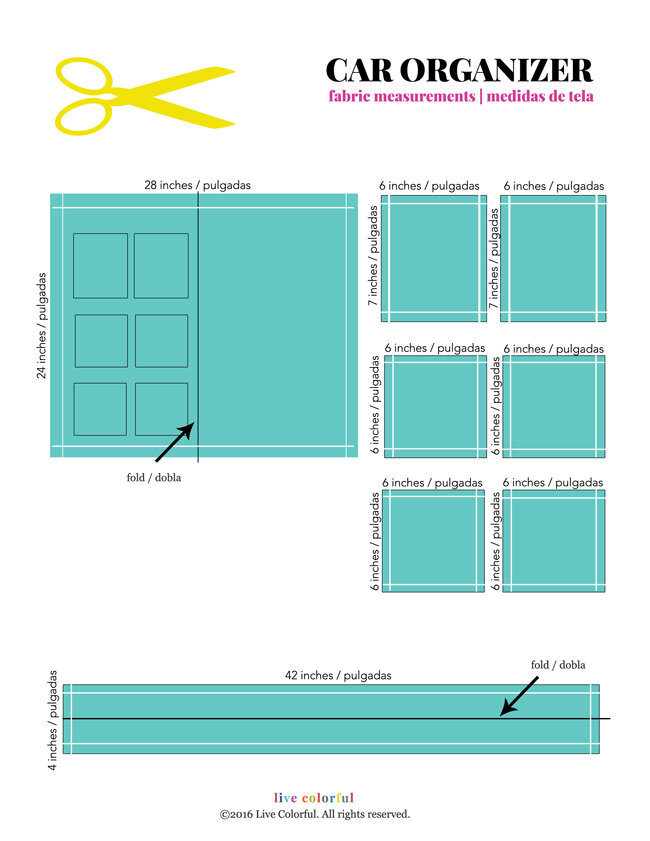
Here are the measurements of the pattern to sew a backseat car organizer
Note: The white lines in the drawing above show the extra 1 inch that I added on each side of the fabric pieces for the hems.
STEPS:
Use the measurements of the pattern above to draw the main body and pockets of your car organizer using a water soluble marker.
Cut all the fabric pieces. (Check out image #1 above for measurements)
Fold and press all the edges of the pockets using an iron (1 inch on each side).
Mark the space of the pockets in your organizer using the water soluble marker.
Sew the pockets in the organizer.
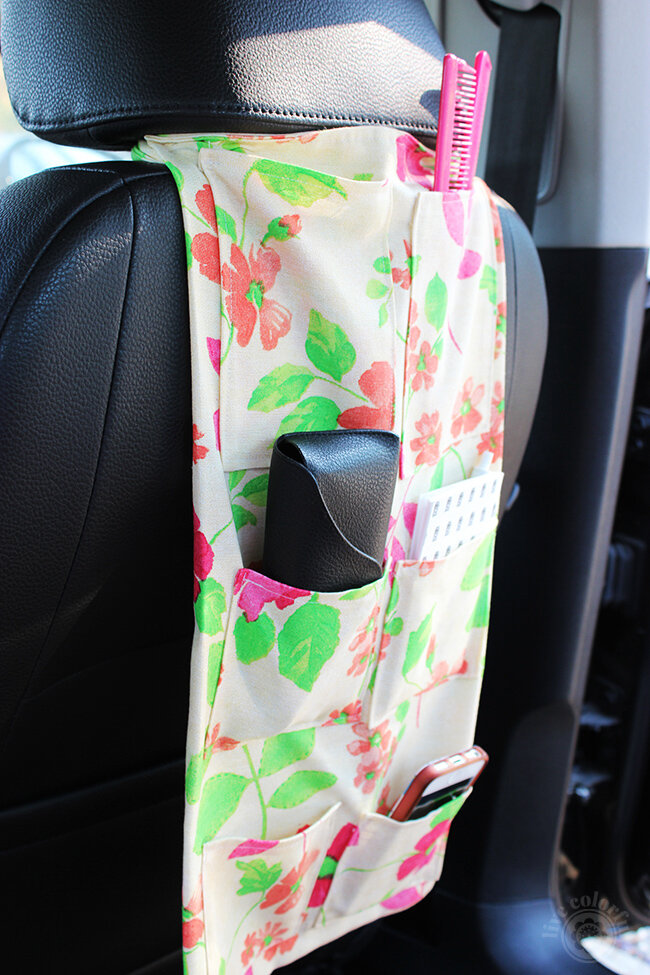
Fold the fabric of the body of your car organizer in the middle, like the image above and close the rectangle so you can hide all the stitches from the pockets.
Make a strip to tie up the car organizer to the car seat. It’s the same process that our headband tutorial here.
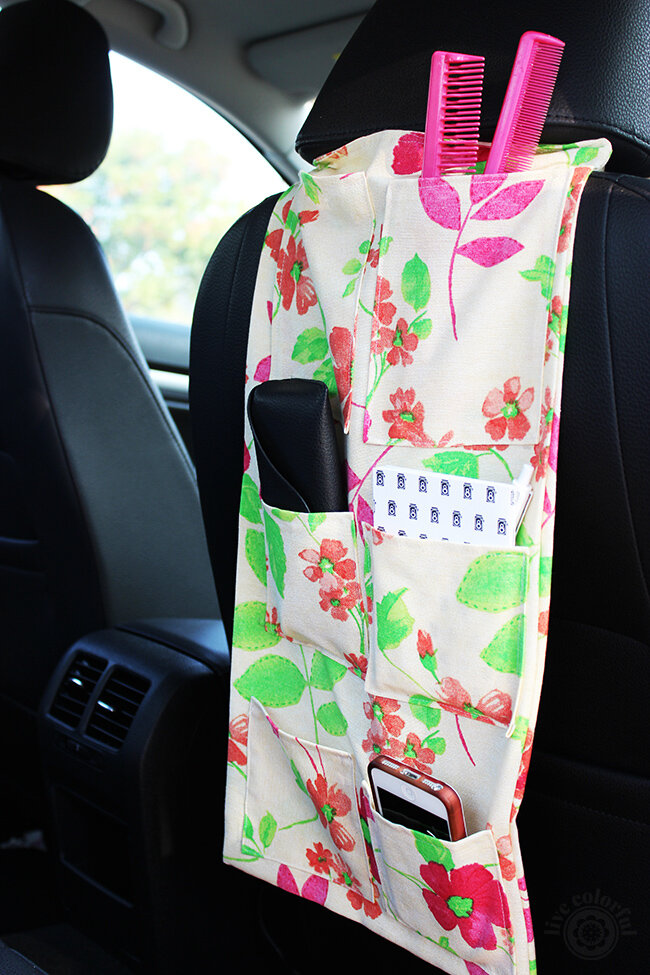
Hang your new awesome piece on the back of your seat and start organizing all your stuff!
My organizer is not too big, but it fits glasses cases, small toys, and my baby’s shoes, and that is exactly what I need.
Adjust the measurements, adding more inches on the sides of the pockets and the main body of the car organizer if you want to be able to organize bigger things in yours :)